Today we will be reviewing the new Dehumaniser a vocal processor based on Max/MSP. Is this what you have been waiting for? Why don’t we find out?
OVERVIEW
Dehumaniser is a vocal processor designed to make you sound like all kinds of monsters from the movies. It was developed by a company named Krotos which is basically just one man named Orfeas Boteas. The Dehumaniser comes as a standalone, download-only product and it is based on the Max/MSP programming language which is all fine and dandy but I do have some thoughts on this which I will deal with later. Dehumaniser first appeared as a prototype which was free and I was lucky enough to grab it then, though it wasn’t anything like the new one we will review today.
The software is divided into two parts or two modes that you can play with – “Simple” and an “Advanced” mode. Both practically do the same thing but the advanced mode is where you will spend most of the time.
It is not as big in content as you might expect weighing nearly cca 80 MB but that is just fine since the software alone does the heavy lifting anyway and the provided presets will get you started in no time. Please note that I am reviewing the pro version of the Dehumaniser and you can download the lite version for free to try it out.
SIMPLE MODE
The simple mode has four main (in my opinion) sections – Input section, Preset section, Output section and a Voice designer section. At the very top of the graphic interface you will find the “on and off” button and, right next to it, a button to switch from a simple mode to an advanced mode which I will explain later. The simple mode is, in my opinion, intended for quick works and preset browsing, it accomplishes this job extremely well. I will not explain the input and output sections in great detail as they are quite obvious.
The presets are nice, giving you a wide range of what Dehumaniser can do with its vocal processing capabilities. You can sound like a dragon, an alien from 9th District or a giant from Lords of the rings and that is mostly thanks to the Voice designer included in the simple mode.
Voice designer
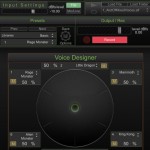 The voice designer is comprised of six sound sources that you can morph between. Each source uses a preset that you can switch at any time (quite handy if you ask me) and all of the presets can be edited in an advanced mode or you can make your own preset and use that. You also have the option to mute the individual preset which is nice. The percentage next to the preset tells you how much of the preset is used; at least, that was my conclusion when I played with it. The entire voice designer is quite handy when it comes to quickly going through presets.
CPU usage
I have to say that the Dehumaniser is quite a CPU hog when it comes to low/mid machines which means that you will get some (or even plenty) of artefacts when morphing the sound. Modern machines should handle it just fine but I just wanted to put that out there in case you currently own a budget machine. Just to give you an example that when I set the Dehumaniser at 96KHz/24bit the CPU usage was 80% on an idle mode. In standard mode (44KHz/24bit) the Dehumaniser ran just fine.
ADVANCED MODE
Like I have mentioned before, this is the mode you will most likely spend time on. It has everything you need to create the perfect monster sound but, before we deal with its interface and its effects, let us have a look at how the monster sounds were created before.
The monster sound typically consists of various layers and I am talking about the premade roars, moans and other types of creature voices. You will need a basic sound most likely a human actor or a good animal recording that you can pitch and stretch and out of which you will create various layers of sounds that creature should have. I have reviewed Creatures from Boom library before and they did an amazing job with their library which consisted entirely out of human voices. That is somewhat a standard on making monster sounds – it is creativity with various sound sources. Things can get a little complicated when you want to have spoken words and most common way to achieve that is to use a vocoder with sound carrier and sound modulator. There are some Youtube videos that show an example of that. The effects that you add additionally will give your monster sound additional flavour. So the main question is; how does the Dehumaniser help you achieve that or how is it different than the standard procedure of making monster sounds? Well, in short it combines all of the mentioned into one hell of a vocoder.
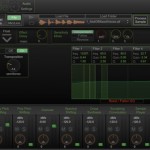
All of the mentioned effects and steps to achieve the monster sounds are available from the get go. Once you have entered the advanced mode you will be presented with an eleven track mixer of various sound processors.
Pitch shifting
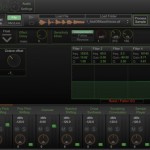
There are three types of pitch shifting – a standard pitch shift which is comprised of two voices that can be turned on and off at any time, have volume control which goes from zero to one and a pitch shift of +/- 24 semitones. Each of the pitch shifting types also includes a 5 band EQ filter with all of the controls you would need to improve a sound. The next pitch shift mode is the Delay pitch shift which in my opinion will can be used to achieve more metallic sounds or robotic like voices. What it does actually is that it uses and input source and loops it and creates this “ever pitch shifting effect” as the developer describes it. All of the controls to achieve that are there – loop pitch shift, delay, feedback and an octave offset knob.
The third effect in the pitch series is the Poly pitch shifting which is a really nice feature of the Dehumaniser. It uses eight voices to achieve the harmonising effect and it is based on input that you set – pre recorded or microphone input. The louder the sound the more voices are activated which can either distort the sound or can give you that additional detail that would separate the your monster sound from the rest.
NOISE GENERATOR, CROSS SYNTHESIS AND GRANULAR SYNTHESIS
Next in line are the various generator effects which primarily as the name suggests, generate the sound. Again all of the effects include the EQ filter at the right side of the screen.
Noise generator
This isn’t your typical noise generator per se but is more like a ring modulator in my opinion that can distort the sound. It doesn’t generate the sound by itself but it uses an input signal as a carrier. You have three controls at your disposal which are “Center frequency”, “Bandwidht” and a “Harmonic index” which acts more like a dry/wet control. Experimenting only with a noise generator will produce interesting results mainly robotic or alien like voices.
Cross synthesis
It is actually a convolution effect that uses a sample player to play the sample once the input signal is detected. It is a bit of a mystery to me and it is one of those effects that you have to try before judging it. What I can conclude is that it acts as a sound follower and it is best used with microphone input as the effect is recognized instantly. It basically adds another sound layer (from sample player) to the input signal which results in some interesting sound details. You can either load a sample or a sample folder where you have the ability to preview the sound and choose the desired playback method – forwards and backwards.
Granular synthesis
Dehumaniser having a granular synthesis is a great thing and you can achieve lots of interesting effects with it and all of the needed controls are there to help you achieve the right sound. You will find all of the controls on the left side of the graphical interface which are “Grain pitch and rate”, “Grain size” and two miscellaneous effects such as stereo spread and maximum number of voices.
ANIMAL CONVOLUTION, SPECTRAL SHIFTING AND SCRUBBING CONVOLUTION EFFECTS
Animal convolution
The Animal Convolution effect uses procedural audio to create mammal sounds with several parameters that define the produced sound. What it does its really interesting and that is that it helps you create another layer of sound based on the sound input which results in a brand new animal sound which can sometimes be interesting (and often frustrating when trying to get accurate results!). Of course you would want to use that in addition to the original sound source.
Spectral shifting
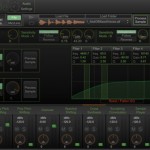
This is a really interesting effect which is based on the level gating technique and can produce great results if used wisely. What it does is use an input source and its amplitude to affect the frequencies that you have chosen in the graphical interface. In laymen’s terms, the stronger the amplitude of the voice is (if you are using microphone) the more the selected frequencies change in pitch. In the graphical interface you can select the amplitude level and determine the pitch that will occur once the selected frequencies are reached. You can control pitch (+/- 32 semitones) and the volume of each of the voices (there are two). This effect produces really great results especially once you get the hang of it.
Scrubbing convolution
This is probably my favourite effect and it uses a sample player with the samples that you can also import and creates this mixture of voices. It uses a sound input and acts as a sound follower while playing back the samples that you have chosen. This results in really great effects and it gives you really special detail that you would normally spend hours making. Best used with a microphone input.
GRAPHIC INTERFACE
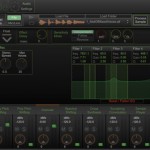
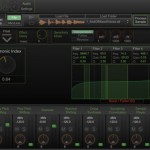
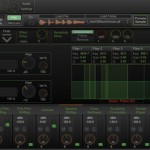
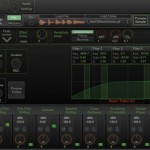
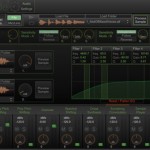
As far as graphical interface goes, I have to say that I personally really like how the Dehumaniser looks and feels. Everything is where one would expect it to be. The advanced mode is far from confusing and each effect can be turned on and off at any time. Once you have clicked the desired effect (click the name of the effect) it gives you all of the options presented in the preview part of the review. There is also a routing section which I haven’t really gotten into but it essentially does what it is supposed to do – routing feels like a breeze especially when you just drag your mouse over the presented fader. Recording and exporting sound also works great and even though you record in one channel (mono) you will get two recordings out of it, one being the processed sample and one which will be your original recording. A great backup if you have to go back to redo some of the samples that you have recorded before.
THE SOUND OUTPUT (a side note)
I have tried a couple of Max/MSP products and for the life of me I can`t figure out why such great products output this funny sounding result. Now, I know that I could have setup something wrong while fiddling with the sound settings but I feel the sound is a bit off to me. I only have this issue with exported audio. The result that Dehumaniser provides is amazing once you plug in your microphone and play with it but, as soon as you listen to your exported recordings, the results are not that overwhelming. It could be that your ears play tricks on you, it could be my sound setting and it could be Max. I had the same feeling with WaveWarper. Maybe someone reading this could shed some light on that subject…
CONCLUSION
The Dehumaniser is one hell of a tool and it isn’t even that expensive if you ask me (pro version is 199 pounds while the lite version is 49 pounds). It is a tool that saves a lot of time with its powerful effects, great graphical interface, great presets and it is really responsive if you are using a microphone as a source input (it really shines actually). I have tried the prototype version and I was lucky enough to try the pro version and in both cases I was really impressed with its capabilities and how well it performed.
The downside is that it is a standalone app but there are ways to connect it to your DAW and the developer even provided the tutorials on how to setup just that. Although this is the first version of the application, you can tell that Dehumaniser will go a long way in the film or game audio field and, although it has its flaws, it is an outstanding piece of software and, as such, I believe you should keep your eyes on this developer in the future.


