INTRODUCTION
iZotope’s award-winning RX is the industry standard for audio repair and enhancement, fixing common audio problems like noise, distortion and inconsistent recordings. Post-production professionals, audio engineers, and video editors alike use RX to transform previously unusable audio into pristine material.
RX’s suite of automatic, intelligent modules reduce manual tasks in your audio production workflow, freeing you up to focus on creative experimentation. And for professionals who need to quickly deliver quality results, the RX 5 Advanced Audio Editor offers even more specialized post-production tools.
In this review I will take a look at the new iZotope RX5 Advanced Audio Editor software. I’ll review the software from the point of view of an almost first time user, since I have only used the previous versions a couple of times before. I will not review the Insight metering suite component so I can focus more on the core RX5 features. So let’s dive in and see what this software can do.
CONTENT
iZotope RX5 Audio Editor comes in two versions (RX5 and RX5 Advanced) and the difference between these versions is noticeable. The RX5 has all the basic repair functions and even some audio enhancement features in it that will definitely help the average user to get rid of nasty problems. RX5 Advanced is geared more towards professional users and comes with advanced versions of the repair functions, a wide array of different audio enhancement features plus you also get the Insight metering suite, bundled as an additional plug-in.
iZotope has provided a more detailed list of the differences between the RX5 and RX5 Advanced on their site and you can check it out HERE.
USER INTERFACE
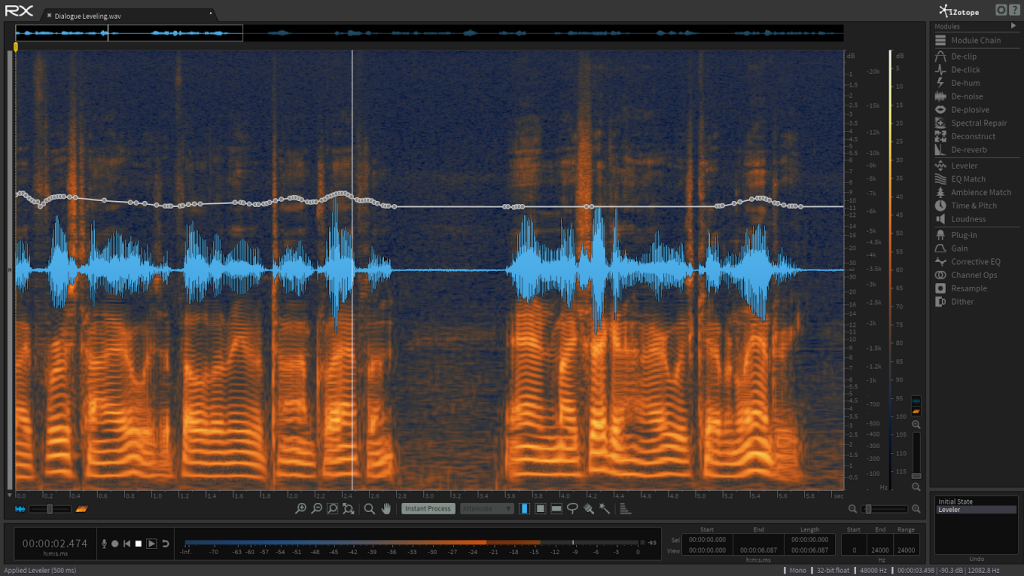
You will spend most of your time on the main interface screen and it’s clear that iZotope has spent time getting the usability and look of the interface just right.
From a first time user perspective the main interface looks a bit crowded, and you might feel a little overwhelmed. I had that feeling at first but after browsing through the different modules, buttons and tools I came to the conclusion that the user interfaces are clear, really well arranged and look great too. By default you will see tool tips that give you info on what a specific button, slider or function does. First time users will find these handy tool tips really useful and they also help you to learn the nuts and bolts of each module pretty fast.
EASE OF USE & SOUND
Personally as a first time user I felt that there was a steep learning curve and that it would take me a long time to learn how to use this software efficiently. I decided to act on this feeling and searched the internet for tutorial videos and pretty quickly found a series called ‘iZotope RX4 Explained‘ by Mike “Mr. RX it” Thornton. I was lucky it was on sale too so for $25 and for that I got over five hours worth of excellent tutorial videos that explain really well how to use the RX software. After watching the tutorial videos and opening up the RX software again I felt like I had been using it for years. Suddenly everything just opened up and I could easily find and efficiently use all the modules in the software. Don’t get me wrong the RX software is quite easy to use once you spend some time with it but personally I just wanted to have a quick head start and the tutorial videos worked really well for that purpose. I can strongly recommend watching them if you are a first time user, or even an advanced user that wants to refresh their memory.
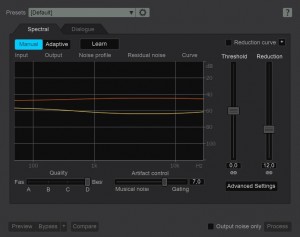
One of my go-to modules in the software is the excellent de-noise module which helps you get rid of unwanted background noise like traffic, air-conditioning hum, microphone self-noise etc. It comes with manual and adaptive modes and I tend to use both of them. The adaptive mode has a learning time slider that gives you control over the length of time the denoiser uses to adapt to changing noise profiles. Unlike the manual mode the adaptive mode does not have the option to learn and use a noise print. A noise print is basically a short recording of background noise from the location you are recording in. Let’s say you only want to record a creaking metal door and you notice a constant hum that comes from the air-conditioning nearby. Normally this would be a big problem and you would need to find a way to stop that hum. This is where the noise print comes in handy. Before I begin recording the door I record 10-15 sec of the background and space as a “noise print”. Then I record the creaks of the door and finish the recordings. Next I will open up the recording in RX5 Advanced and show you how to clean it up.
Below you have my original recording of the creaking door and you can clearly hear the hum of the air-conditioning in the background and some other unwanted noises too.
The first thing I want to do is to learn the profile of the background noise so I just select a short clip of the noise from the beginning of the file and then open up the de-noise module and click the learn button. Now that I have a noise profile I can preview it with preview button and I can also use the output noise only checkbox so I can hear the content that is being taken out. This is a good way to make sure that you are not taking out any of the useful audio content. When I am happy with the result I select the whole audio file and click process. Below you can hear the de-noised version of the same audio file and the results are outstanding! So I definitely recommend you to always record a noise print of the location.
The next module I want to showcase is the de-reverb module which helps you to reduce some of the reverb from a recorded space in order to make the dialogue or in our case the metal door creaks more useable.
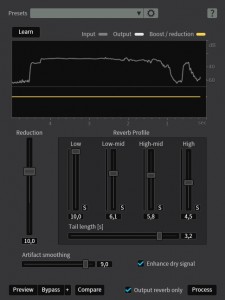
De-reverb module is really easy to use and you can get great results with it fast. The first thing I will do is to load up the de-noised version of the metal door creaks and select a couple of those nice creaks with the reverb tail included. Then I open up the de-reverb module and click the learn button. When the reverb profile has been learned de-reverb automatically adjusts all the parameters so you can just preview the audio and listen if the results are satisfactory. In general I have found that the learn button gives you good results and you don’t have to do much tweaks to the parameters but I always make sure to preview the audio with the output reverb only checkbox checked so that I know I am not overdoing the processing.
Here is the de-noised and de-reverbed metal door creak audio file. I managed to get rid of that slight reverb tail with de-reverb and when you compare it to the original file the difference is huge and after processing the file two times I don’t hear any noise artifacts either.
Another cool and useful module is the Leveler module which, as it suggests, is really efficient at leveling multiple sounds to the same RMS level. In my example I am going to use below audio file of bumblebee flying sounds. As you can hear the sounds are on different levels and we need to fix that.
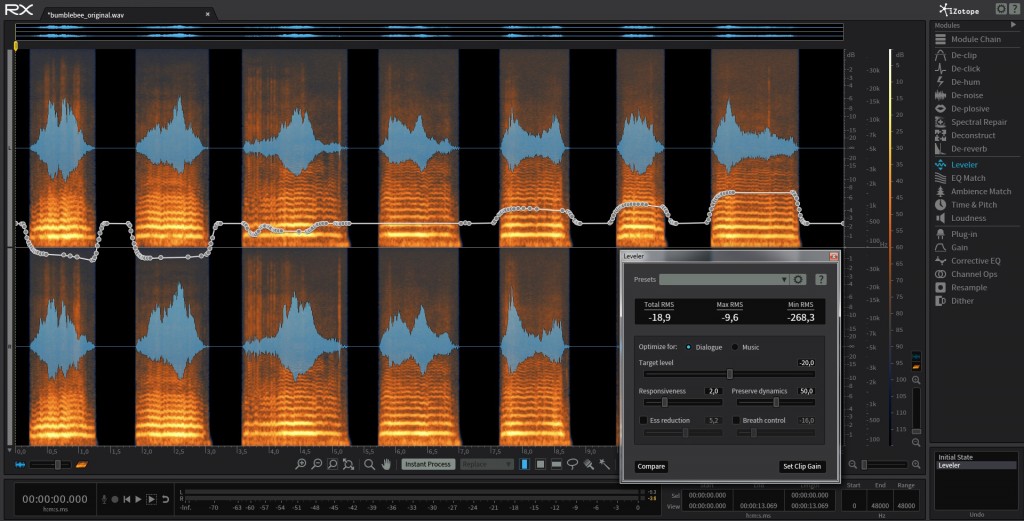
This problem can be fixed easily with the leveler module. First you load up the audio file to RX5 Advanced and then open up the leveler module. When the leveler module opens up RX5 automatically inspects the audio file and calculates the total, minimum and maximum RMS values. Then we need to choose the optimization and we can choose dialogue. I tend to use this for everything but music and so far I have not had any problems with it when using it for sound effects. Then we set the RMS level with the target level slider to -20 dB. I tend to leave the responsiveness and preserve dynamics sliders to their default position. Finally we untick the ess reduction and breath control options because we won’t need them for this kind of sound. Then we click set clip gain and process the audio file.
In the picture above you can clearly see how RX5 adjusted the clip gain of each of the sounds according to our set parameters. Here is the leveled audio file so you can compare the difference to the original file. As you can see and hear the leveler module is a really handy tool when you want to quickly and efficiently process the clip gain of individual sounds to a specific RMS level.
Instant Process Tool lets you quickly paint an audio problem away without needing to open a module, choose settings, and then click Process. Instant Process Tool is a really powerful and easy to use feature to clean up your audio files with just a few mouse clicks. Another cool thing is that you can use it with all the selection tools so you can easily repair bigger areas too.
One of my favourite combos is to use it in combination with all the advanced functions of the modules. I like to quickly paint away the easiest and obvious problems and then open up the needed modules to clean up the more difficult ones. So let’s do that and clean up the handling noise pops and thumps from the already de-noised and de-reverbed metal door creak recording.
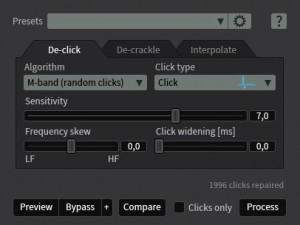
The first thing you want to do is to get rid of that excess audio content in the beginning of the file so you just select it and press the delete button. Next you want to run the de-click module and choose to use Multi-band (random clicks) algorithm since the clicks are not happening in equal intervals. Then you choose the click type, set the sensitivity to a good level and preview how the settings are affecting the audio. When you are happy with the results then you just click process.
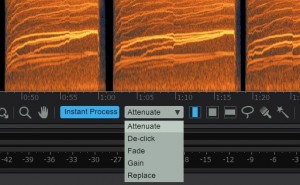
Finally, you activate the Instant Process Tool by pressing the Instant Process button and then choose the processing method from the pull down menu on the right. You can choose between attenuate, de-click, fade, gain and replace functions. Since we are cleaning up short pops and thumps and we don’t want there to be any empty holes in the audio spectrum we will choose the replace function. It basically analyses the surrounding audio before and after the selection and then fills the selection with that content. Then you just use the spectrogram view to find the unwanted pops and thumps and paint them away. Here is our final audio file that has been processed through de-noise, de-reverb and de-click modules and finished with a touch of instant process tool. The final audio file has been cleaned nicely, sounds great and the noise artifacts are nowhere near to be heard!
UNDER THE HOOD
There are a couple of things that affect the processing speed of your audio. The main thing is the speed of your CPU. Advanced modules like De-reverb are bound to use a bit more CPU than the simpler ones. You also have quality settings that you can tweak in modules like de-noise. When applying the de-noise module in an adaptive mode with quality D (best) to a 3 minute clip full of short sound effects the processing took around 2 minutes which is not bad at all. On the other hand when I used the same audio file in the leveler module to even out the volume differences between the sound effects the processing took only 20 seconds and the results were perfect. Overall I have not seen or felt any CPU hiccups while using the software on my old Intel quad-core desktop computer so from a technical perspective RX5 seems to have really efficient algorithms which make the software really fast and efficient to use.
One of the key things that I wanted to test with RX5 was how it controls and keeps down the gurgly sounding noise artifacts that can occur while doing hardcore processing. I’m happy to say that even when deliberately pushing the processing the amount of unwanted noise artifacts has been very low. In modules like de-noise you have a slider that you can use to smooth out these artifacts even more. Mike Thornton shared a great tip in the Groove3 tutorial videos related to this; instead of doing one strong noise reduction pass you should do two weaker ones. This is supposed to help to keep the noise artifacts down and I can see the logic in that.
VALUE FOR MONEY
The price for the standard edition of RX5 is $349.00 which is reasonable considering that you get a great basic set of repair tools and audio enhancements. The price of RX5 Advanced version is $1.199 which makes you think twice which version is better suited for your needs and your wallet. In the end it is up to you to make that call so make sure to download a trial version of the software and try it out yourself.
CONCLUSION
I don’t know what magic potions they are drinking at iZotope but that magic sure has found its way to the software itself. iZotope RX5 Advanced is a powerful, comprehensive and highly efficient audio restoration software that is easy and fast to use once you spend enough time with it. The user interfaces are clear, nicely arranged and great looking while not forgetting the usability.


